Month: February 2015

DIY Hyperion Planning – Create the Repositories

Some Context . . .

This is the sixth post in a multi-part blog educating readers on how to build a personal “sandbox” environment for Hyperion Planning. Click here to see all nine posts in the series.

Configure Repositories

Most products in the EPM stack require a relational repository. In the steps below, we will create blank schemas in our Oracle 12c database. Later, these schemas will be populated automatically during product configuration. But for now, all we need are blank schemas, user ID’s and some general settings.

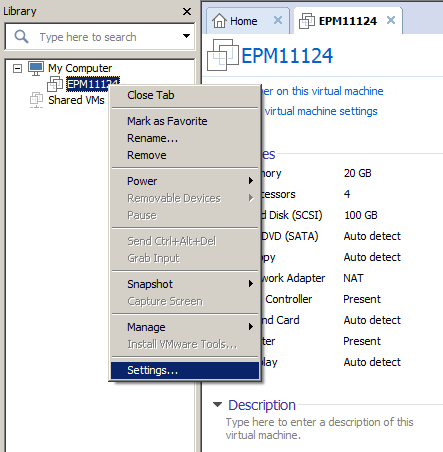
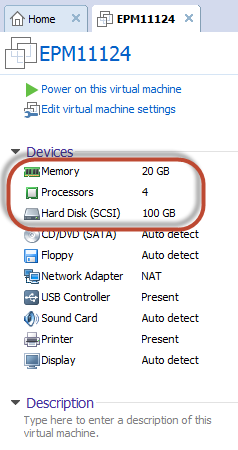
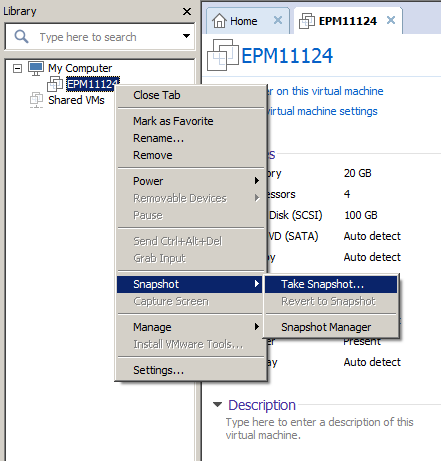
To get started, make sure your VM is up and running.

2-5-2015 2-11-33 PM

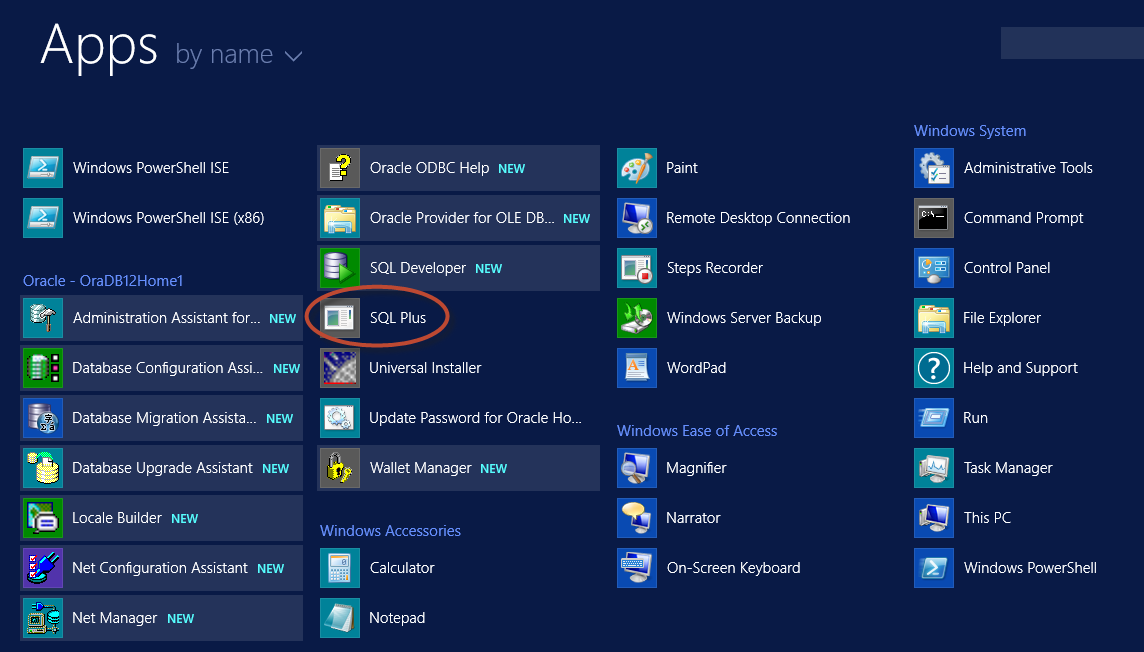
Within your VM, open SQL Plus.

2-5-2015 2-13-42 PM

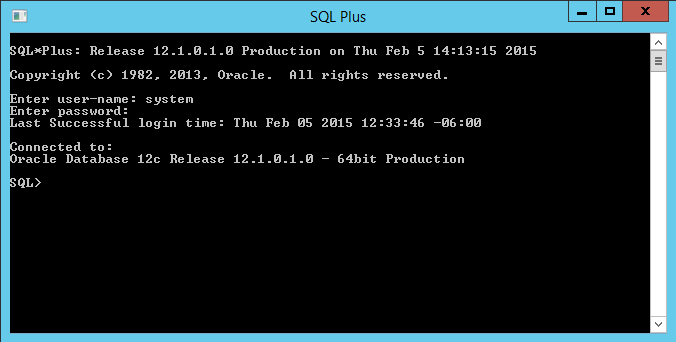
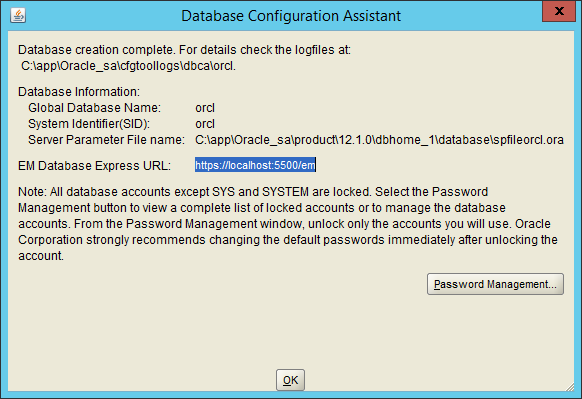
Enter the user ID “system”. Use the password entered during the Oracle 12c installation . . . this is the administrative password.

Paste the following commands into SQL Plus:

/* Database Settings */
ALTER SYSTEM SET OPEN_CURSORS=5000 scope=SPFILE;
ALTER SYSTEM SET PROCESSES=1000 scope=SPFILE;
ALTER SYSTEM SET SESSIONS=2000 scope=SPFILE;
ALTER SYSTEM SET SESSION_CACHED_CURSORS=200 scope=SPFILE;

/* Increase Temp Tablespace Size */
ALTER DATABASE
TEMPFILE 'C:\APP\ORACLE_SA\ORADATA\ORCL\TEMP01.DBF'
DROP INCLUDING DATAFILES;

ALTER TABLESPACE TEMP ADD TEMPFILE
'C:\APP\ORACLE_SA\ORADATA\ORCL\TEMP01.DBF' SIZE 2G
AUTOEXTEND ON NEXT 500M MAXSIZE UNLIMITED;

/* Create EAS Repository */
CREATE SMALLFILE TABLESPACE EAS
DATAFILE 'C:\APP\ORACLE_SA\ORADATA\ORCL\EAS_DATA.dat'
SIZE 2G
AUTOEXTEND ON
NEXT 500M;
COMMIT;

CREATE USER EAS IDENTIFIED BY epm_EAS
DEFAULT TABLESPACE EAS TEMPORARY TABLESPACE TEMP ACCOUNT UNLOCK;
GRANT
CREATE ANY SYNONYM
, CREATE CLUSTER
, CREATE INDEXTYPE
, CREATE PROCEDURE
, CREATE SEQUENCE
, CREATE SESSION
, CREATE TABLE
, CREATE TRIGGER
, CREATE TYPE
, CREATE VIEW
, DROP ANY SYNONYM
, UNLIMITED TABLESPACE
TO EAS;

/* Create Shared Services Repository */
CREATE SMALLFILE TABLESPACE SS
DATAFILE 'C:\APP\ORACLE_SA\ORADATA\ORCL\SS_DATA.dat'
SIZE 2G
AUTOEXTEND ON
NEXT 500M;
COMMIT;

CREATE USER SS IDENTIFIED BY epm_SS
DEFAULT TABLESPACE SS TEMPORARY TABLESPACE TEMP ACCOUNT UNLOCK;
GRANT
CREATE ANY SYNONYM
, CREATE CLUSTER
, CREATE INDEXTYPE
, CREATE PROCEDURE
, CREATE SEQUENCE
, CREATE SESSION
, CREATE TABLE
, CREATE TRIGGER
, CREATE TYPE
, CREATE VIEW
, DROP ANY SYNONYM
, UNLIMITED TABLESPACE
TO SS;

/* Create EPMA Repository */
CREATE SMALLFILE TABLESPACE EPMA
DATAFILE 'C:\APP\ORACLE_SA\ORADATA\ORCL\EPMA_DATA.dat'
SIZE 2G
AUTOEXTEND ON
NEXT 500M;
COMMIT;

CREATE USER EPMA IDENTIFIED BY epm_EPMA
DEFAULT TABLESPACE EPMA TEMPORARY TABLESPACE TEMP ACCOUNT UNLOCK;
GRANT
CREATE ANY SYNONYM
, CREATE CLUSTER
, CREATE INDEXTYPE
, CREATE PROCEDURE
, CREATE SEQUENCE
, CREATE SESSION
, CREATE TABLE
, CREATE TRIGGER
, CREATE TYPE
, CREATE VIEW
, DROP ANY SYNONYM
, UNLIMITED TABLESPACE
TO EPMA;

/* Create Planning Repository */
CREATE SMALLFILE TABLESPACE PLANSYS
DATAFILE 'C:\APP\ORACLE_SA\ORADATA\ORCL\PLANSYS_DATA.dat'
SIZE 2G
AUTOEXTEND ON
NEXT 500M;
COMMIT;

CREATE USER PLANSYS IDENTIFIED BY epm_PLANSYS
DEFAULT TABLESPACE PLANSYS TEMPORARY TABLESPACE TEMP ACCOUNT UNLOCK;
GRANT
CREATE ANY SYNONYM
, CREATE CLUSTER
, CREATE INDEXTYPE
, CREATE PROCEDURE
, CREATE SEQUENCE
, CREATE SESSION
, CREATE TABLE
, CREATE TRIGGER
, CREATE TYPE
, CREATE VIEW
, DROP ANY SYNONYM
, UNLIMITED TABLESPACE
TO PLANSYS;

/* Create Planning App Repository */
CREATE SMALLFILE TABLESPACE PLANAPP1
DATAFILE 'C:\APP\ORACLE_SA\ORADATA\ORCL\PLANAPP1_DATA.dat'
SIZE 2G
AUTOEXTEND ON
NEXT 500M;
COMMIT;

CREATE USER PLANAPP1 IDENTIFIED BY epm_PLANAPP1
DEFAULT TABLESPACE PLANAPP1 TEMPORARY TABLESPACE TEMP ACCOUNT UNLOCK;
GRANT
CREATE ANY SYNONYM
, CREATE CLUSTER
, CREATE INDEXTYPE
, CREATE PROCEDURE
, CREATE SEQUENCE
, CREATE SESSION
, CREATE TABLE
, CREATE TRIGGER
, CREATE TYPE
, CREATE VIEW
, DROP ANY SYNONYM
, UNLIMITED TABLESPACE
TO PLANAPP1;

/* Create Calc Manager Repository */
CREATE SMALLFILE TABLESPACE CALC
DATAFILE 'C:\APP\ORACLE_SA\ORADATA\ORCL\CALC_DATA.dat'
SIZE 2G
AUTOEXTEND ON
NEXT 500M;
COMMIT;

CREATE USER CALC IDENTIFIED BY epm_CALC
DEFAULT TABLESPACE CALC TEMPORARY TABLESPACE TEMP ACCOUNT UNLOCK;
GRANT
CREATE ANY SYNONYM
, CREATE CLUSTER
, CREATE INDEXTYPE
, CREATE PROCEDURE
, CREATE SEQUENCE
, CREATE SESSION
, CREATE TABLE
, CREATE TRIGGER
, CREATE TYPE
, CREATE VIEW
, DROP ANY SYNONYM
, UNLIMITED TABLESPACE
TO CALC;

/* Create Reporting and Analysis Repository */
CREATE SMALLFILE TABLESPACE BIPLUS
DATAFILE 'C:\APP\ORACLE_SA\ORADATA\ORCL\BIPLUS_DATA.dat'
SIZE 2G
AUTOEXTEND ON
NEXT 500M;
COMMIT;

CREATE USER BIPLUS IDENTIFIED BY epm_BIPLUS
DEFAULT TABLESPACE BIPLUS TEMPORARY TABLESPACE TEMP ACCOUNT UNLOCK;
GRANT
CREATE ANY SYNONYM
, CREATE CLUSTER
, CREATE INDEXTYPE
, CREATE PROCEDURE
, CREATE SEQUENCE
, CREATE SESSION
, CREATE TABLE
, CREATE TRIGGER
, CREATE TYPE
, CREATE VIEW
, DROP ANY SYNONYM
, UNLIMITED TABLESPACE
TO BIPLUS;

The table below includes a summary of the repositories created in the SQL above.

Schema Description User ID Password
SS Shared Services SS epm_SS
EPMA Enterprise Performance Management Architect EPMA epm_EPMA
EAS Essbase Administration Services EAS epm_EAS
PLANSYS Planning System Repository PLANSYS epm_PLANSYS
PLANAPP1 Planning Application Repository PLANAPP1 epm_PLANAPP1
CALC Calculation Manager CALC epm_CALC
BIPLUS Financial Reporting and Web Analysis BIPLUS epm_BIPLUS

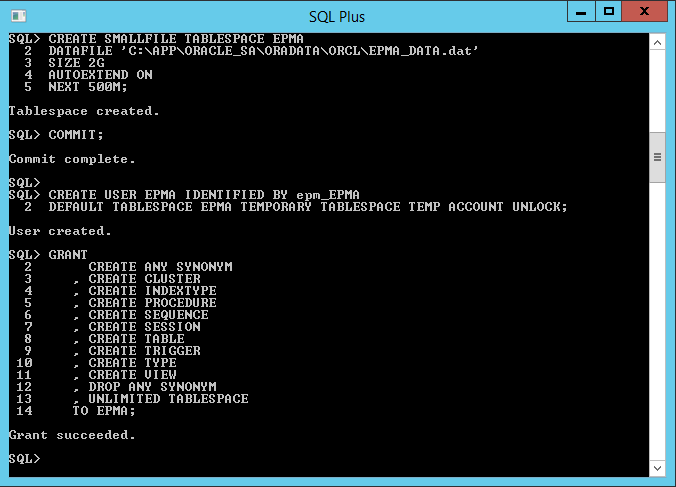
The following screenshot illustrates the creation of the EPMA repository and user:

2-5-2015 3-00-55 PM

In the Next Post

Now that the application schemas and user ID’s have been created, we are finally ready to install Hyperion Planning and the related EPM products!!! Click here for the next post in the series.

DIY Hyperion Planning – Install Oracle RDBMS

Some Context . . .

This is the fifth post in a multi-part blog educating readers on how to build a personal “sandbox” environment for Hyperion Planning. Click here to see all nine posts in the series.

Installing the Oracle Database

Although Hyperion Planning stores the majority of its data in Essbase, most of the products in the EPM stack have relational repositories. For this reason, a relational database is required. In this example, we will use Oracle’s 12c database.

Shared Folders

Before we can install any software on our VM, we need to ensure that our server can see files stored on our host (because we downloaded all of the software on our host and there’s no point in storing these files on the VM as well). VMware Workstation has the ability to create “Shared” folders that show up as mapped drives on the VM. This makes it easy to access files on the host from the VM.

From VMware Workstation, right click on the server.

2-13-2015 9-32-42 AM

Select “Settings”, then select the “Options” tab.

Select the “Shared Folders” setting.

Select the “Always Enabled” radio button. Check the box to map as a network drive.

Select “Add”. The following wizard will be displayed:

2-3-2015 9-21-56 PM

Select “Next”.

2-3-2015 9-22-42 PM

Browse to a directory. Make sure this directory contains the software downloaded from the second post in this series. (Note – you can map an entire drive if you want.) Provide a name for the shared folder.

Select “Next”.

2-3-2015 9-24-28 PM

Select the check box to enable the share. Select “Finish”.

Select “OK”.

If your virtual server isn’t already running, start it.  Check to ensure you can access your host from the virtual machine in File Explorer.

2-3-2015 9-32-21 PM

Install Oracle 12c

In the second post in this series, we downloaded the following files from edelivery:

File Contents
V38894-01 Part 1 of 2 Oracle Database 12c Release 1 (12.1.0.1.0) for Microsoft Windows x64 (64-bit) (Part 1 of 2)
V38894-01 Part 2 of 2 Oracle Database 12c Release 1 (12.1.0.1.0) for Microsoft Windows x64 (64-bit) (Part 2 of 2)


Unzip these files into a single directory on your host.

Make sure these files are available under the directory you shared in the steps above.

After logging into your virtual server, open File Explorer. Browse to the shared folder in “Network locations”.

Make sure you can access the Oracle 12c software that was previously unzipped on your host.

Open the “database” folder.

Right-click on “setup” and select “Run as administrator”. The Oracle Universal Installer will open.

2-4-2015 7-49-46 PM

Enter your Oracle support contact information if desired. This is not required. Select “Next”.

2-4-2015 7-51-56 PM

Enter Oracle Support credentials to download software or updates, or skip software updates.

Select “Next”.

2-4-2015 7-53-51 PM

Select “Create and configure a database”. Select “Next”.

2-4-2015 7-55-08 PM

Select “Desktop class”. Select “Next”.

2-4-2015 7-58-15 PM

Select “Create New Windows User”. Enter a user ID and password. Write these down.

2-9-2015 5-16-03 PM

Accept the default file locations.

Select the database edition.

Use the “AL32UTF8” Character set.

Enter an admin password.

DO NOT CREATE AS A CONTAINER DATABASE!!!  Please make sure this check box is not selected.

2-4-2015 8-06-52 PMSelect “Next”. Installation will begin.

The installer will check prerequisites and then present a summary of selected options.

2-9-2015 5-17-16 PM

Select “Install”.  This part takes a while.  Eventually the screen below will be displayed.

2-16-2015 4-05-15 PM

Select “OK”, then “Close”.

Update Oracle Networking Files

There are three key files that must be updated, called “tnsnames.ora”, “listener.ora” and “sqlnet.ora”.  These files are located in the following directory:

C:\app\Oracle_sa\product\12.1.0\dbhome_1\NETWORK\ADMIN

Edit the “listener.ora” file.  Update the HOST with the static IP address you assigned to the network adapter.

2-16-2015 5-37-33 PM

Save the “listener.ora” file.

Edit the “tnsnames.ora” file.  Update the HOST with the static IP address you assigned to the network adapter.

2-16-2015 5-38-09 PM

Note that the IP address is updated in two locations above.

Save the “tnsnames.ora” file.

Edit the “sqlnet.ora” file.  Add the line circled below.

2-16-2015 6-03-38 PM

Save the “sqlnet.ora” file.

Shut down your VM and take a snapshot.

In the Next Post

With the relational database installed, it’s time to create the application repositories. Click here for the next post in the series.

DIY Hyperion Planning – Create a Virtual Server

Some Context . . .

This is the fourth post in a multi-part blog educating readers on how to build a personal “sandbox” environment for Hyperion Planning. Click here to see all nine posts in the series.

Creating a Virtual Machine

Now that VMware Workstation has been installed, the fun begins. The following steps will create a virtual server that runs on your host. In my case, the host is my laptop. Make sure you have your server operating system software available, along with any required license key.

To get started, launch VMware Workstation.

0126

Select “Create a New Virtual Machine”.

0125

Create a “Typical” VM. Select “Next”.

0124

Tell VMware where the Windows Server installation media is located. You can point to either a drive, or an ISO file. I’m using an ISO file above. Select “Next”.

0122

Select the version of Windows you are using. Enter the product key, user ID and password. This is the user ID and password that you will use to log into Windows Server 2012. Select “Next”.


2-13-2015 8-23-10 AM

Enter a name for the virtual machine. This is not the actual “computer name” in Windows, but rather the name of the VM within VMware Workstation. I tend to use the same name from my VM and Windows computer name.

Provide a location for the files. I recommend creating a specific directory for each VM as many files are created. Having them all in a single directory makes it easier to move them around. Select “Next”.

0028

Give your VM somewhere around 70-100GB. You can use less space if you don’t intend on loading a lot of data into Essbase.

Make sure to select the option to split the VM files into multiple files. This will simplify moving these files at a later date. Select “Next”.

2-13-2015 8-23-59 AM

Review your VM settings. Be especially aware of where you are placing the VM files as these can take significant space.

Some of these settings will be updated later. Select “Finish”.

VMware will begin installing Windows Server 2012 R2.

0025

The install takes a bit. Windows Server will eventually restart.

0023

Your server operating system is now installed on your VM, however there are some remaining configuration steps that are still required.

Changing the Server Name

After logging back into your virtual server, Server Manager should be displayed. Select the “Local Server” tab.

0021

Click on the server name (mine is “WIN-LPSIVO2KTLS” above, however yours will be different).

0020

Press the “Change” button, and provide a name for the virtual server.

2-13-2015 8-40-10 AM

Select “OK”. After being prompted to restart, select “OK”. Close the System Properties window and select “Restart Now”.

Run Windows Update (Optional)

Navigate to Control Panel.  Select “System and Security”.  Under “Windows Update”, select “Check for Updates”.

0018

Select “Install Updates”. Get some coffee . . . this takes a while.

0017

Select “Restart Now”.

Firewalls

Firewalls can complicate the installation and configuration of certain EPM products. If you use your VM’s intermittently, you may consider turning off the firewall on your VM’s operating system. Please note that this would likely not be appropriate for a “real” environment. To turn off the Windows firewall on your VM, launch the Server Manager dashboard. Select “Local Server”.

2-13-2015 8-47-59 AM

Click the “Public: On” link.

Select “Turn Windows Firewall on or off”. Turn off the firewall.

2-4-2015 6-06-42 PM

Select “OK”.

Select “Finish”.

Assign Static IP Addresses

Navigate to Control Panel.

2-16-2015 1-01-31 AM

Select “Network and Internet”.

2-16-2015 1-02-46 AM

Select “Network and Sharing Center”.

2-16-2015 5-33-45 PM

Select “Change Adapter Settings”.

2-16-2015 5-34-25 PM

Right-click on the network adapter.  Select “Properties”.

Double-click on “Internet Protocol Version 4 (TCP/IPv4)”.

2-16-2015 5-35-02 PM

Assign a “non-routable” IP address (like the one I used above).

Select “OK”, then select “OK” again.

Update the HOSTS File

Edit the hosts file located in:

C:\Windows\System32\drivers\etc

2-16-2015 5-36-00 PM

Add the line circled above, using the static IP address you assigned to your network adapter. Make sure to use the name of your server.

Disable UAC

Before installing Hyperion Planning, UAC (User Account Control) must be deactivated. To do this, open a command prompt. Press the Windows Key then “X”.

2-4-2015 7-26-43 PM

Select “Command Prompt (Admin)”.

Type “regedit” in the command prompt.

Navigate to “HKEY_LOCAL_MACHINE\SOFTWARE\Microsoft\Windows\CurrentVersion\policies\system”.

2-4-2015 7-30-58 PM

Select the “system” member above.

Right-click the DWORD “EnableLUA”. Select “Modify”.

2-4-2015 7-32-39 PM

Change the data value from 1 to 0. Select “OK”.

Restart the virtual server.

Miscellaneous VM Settings

Before going too far, now may be a good time to increase the memory and processors dedicated to the VM. I recommend 12GB of RAM for a “compact deployment” and 20GB for a regular deployment. I also start with 4 processors. These settings can be changed later on, so don’t worry too much about getting them exactly “right”.

Click on your VM’s memory under “Devices”.

2-13-2015 9-28-36 AM

Increase memory and CPU count as required.

Select “OK”.

Photo Finish

At this point, your operating system is configured! After all of this work, it’s a good idea to take a snapshot in VMware Workstation. In the event that something goes wrong later in the installation, developers can revert to a snapshot so they aren’t starting over from scratch.

The ability to revert to a snapshot is the most incredibly awesome feature of any virtualization software. It allows developers to try things, make mistakes, and then revert to an old snapshot. It’s like a free “do-over”. But it only works if you actually take the snapshot, so take snapshots often. And be aware that they do take disk space.

Right-click on the server name in VMware Workstation and select “Snapshot”, then “Take Snapshot”.

2-13-2015 9-30-48 AM

Take notes regarding the work done to date.

Select “Take Snapshot”.

Restart the VM.

In the Next Post

With the operating system installed, it’s time to install and configure the relational database. Click here for the next post in the series.