Some Context . . .
This is the fifth post in a multi-part blog educating readers on how to build a personal “sandbox” environment for Hyperion Planning. Click here to see all nine posts in the series.
Installing the Oracle Database
Although Hyperion Planning stores the majority of its data in Essbase, most of the products in the EPM stack have relational repositories. For this reason, a relational database is required. In this example, we will use Oracle’s 12c database.
Shared Folders
Before we can install any software on our VM, we need to ensure that our server can see files stored on our host (because we downloaded all of the software on our host and there’s no point in storing these files on the VM as well). VMware Workstation has the ability to create “Shared” folders that show up as mapped drives on the VM. This makes it easy to access files on the host from the VM.
From VMware Workstation, right click on the server.
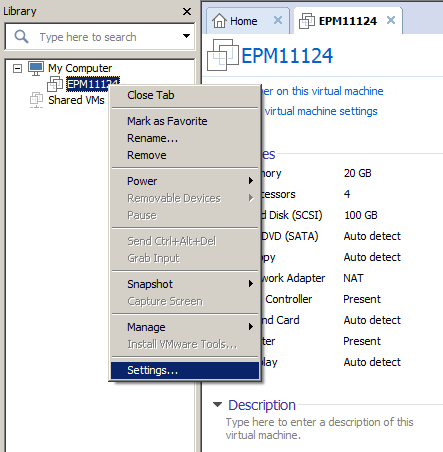
Select “Settings”, then select the “Options” tab.
Select the “Shared Folders” setting.
Select the “Always Enabled” radio button. Check the box to map as a network drive.
Select “Add”. The following wizard will be displayed:
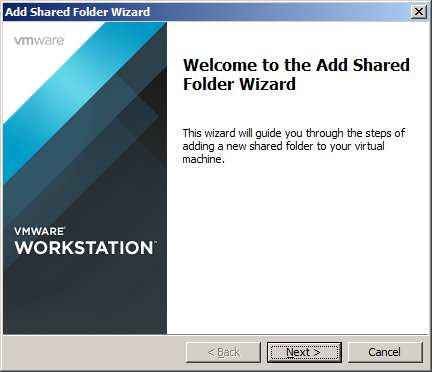
Select “Next”.
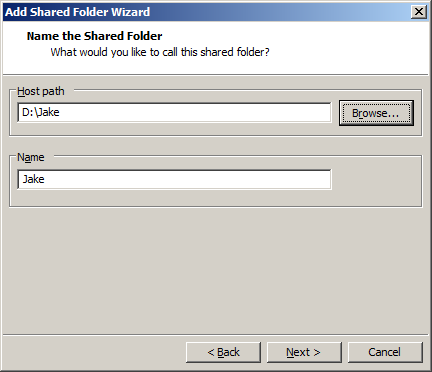
Browse to a directory. Make sure this directory contains the software downloaded from the second post in this series. (Note – you can map an entire drive if you want.) Provide a name for the shared folder.
Select “Next”.
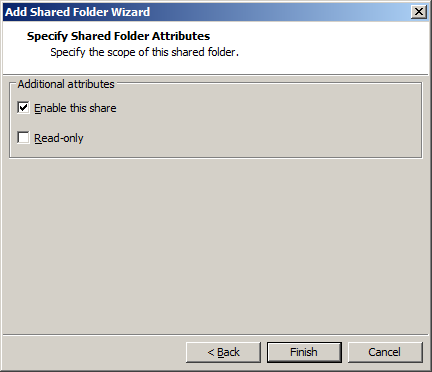
Select the check box to enable the share. Select “Finish”.
Select “OK”.
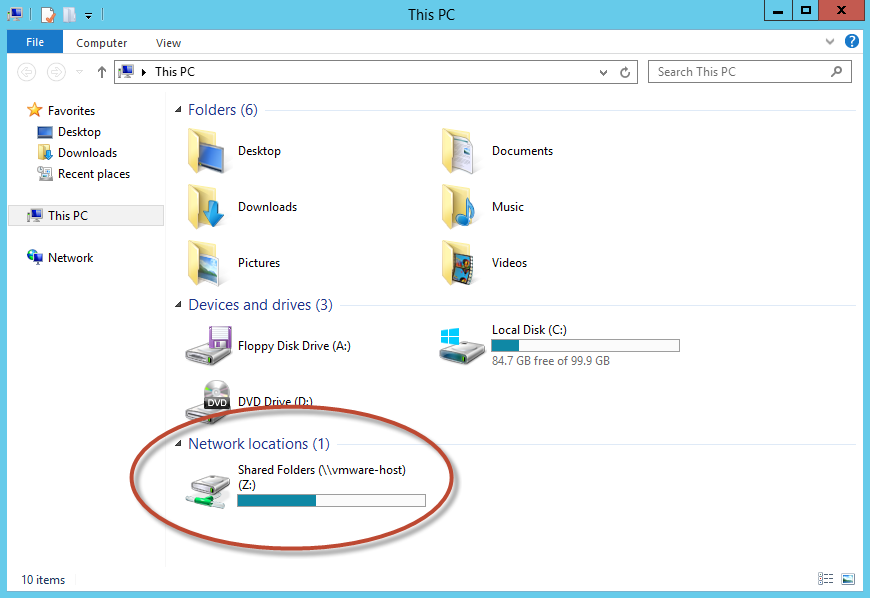
If your virtual server isn’t already running, start it. Check to ensure you can access your host from the virtual machine in File Explorer.
Install Oracle 12c
In the second post in this series, we downloaded the following files from edelivery:
| File | Contents |
| V38894-01 Part 1 of 2 | Oracle Database 12c Release 1 (12.1.0.1.0) for Microsoft Windows x64 (64-bit) (Part 1 of 2) |
| V38894-01 Part 2 of 2 | Oracle Database 12c Release 1 (12.1.0.1.0) for Microsoft Windows x64 (64-bit) (Part 2 of 2) |
Unzip these files into a single directory on your host.
Make sure these files are available under the directory you shared in the steps above.
After logging into your virtual server, open File Explorer. Browse to the shared folder in “Network locations”.
Make sure you can access the Oracle 12c software that was previously unzipped on your host.
Open the “database” folder.
Right-click on “setup” and select “Run as administrator”. The Oracle Universal Installer will open.
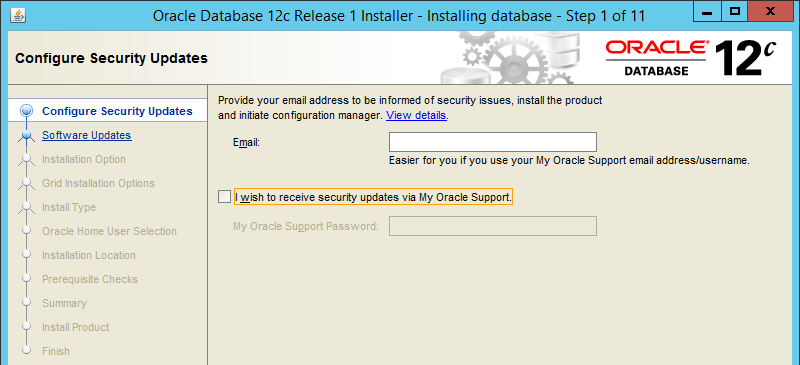
Enter your Oracle support contact information if desired. This is not required. Select “Next”.
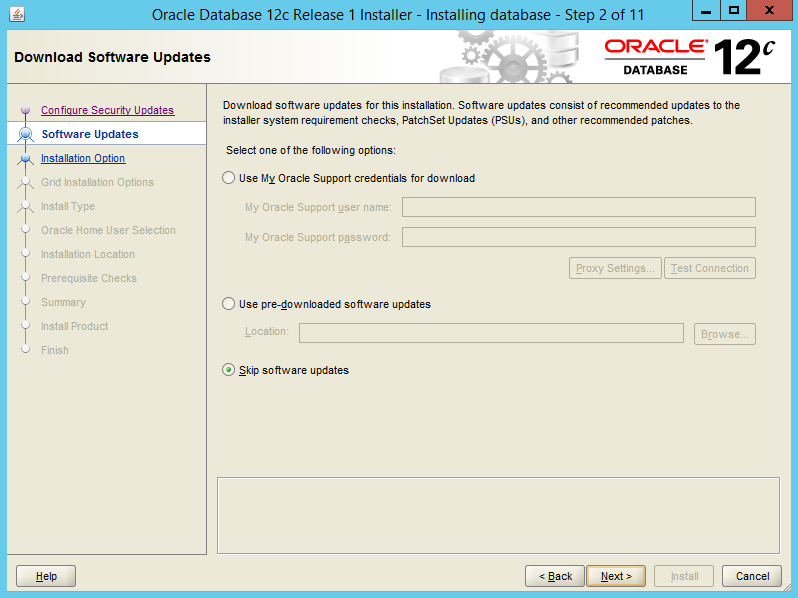
Enter Oracle Support credentials to download software or updates, or skip software updates.
Select “Next”.
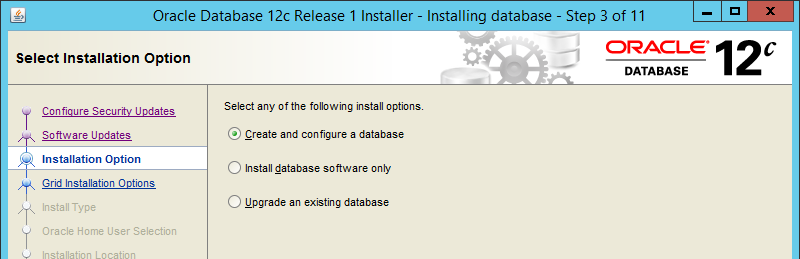
Select “Create and configure a database”. Select “Next”.

Select “Desktop class”. Select “Next”.
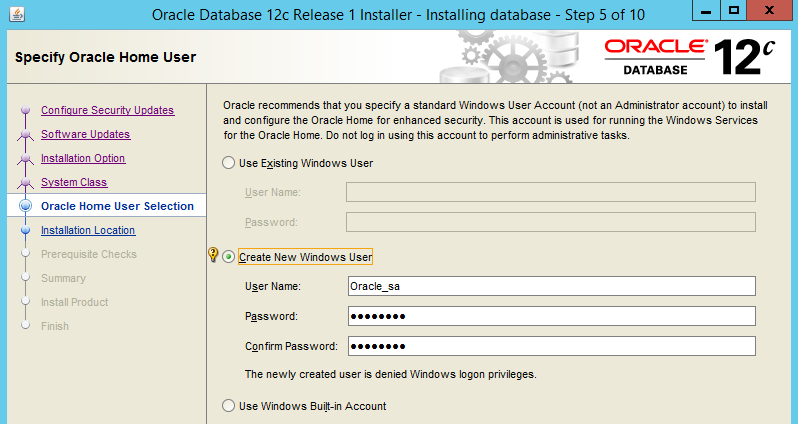
Select “Create New Windows User”. Enter a user ID and password. Write these down.
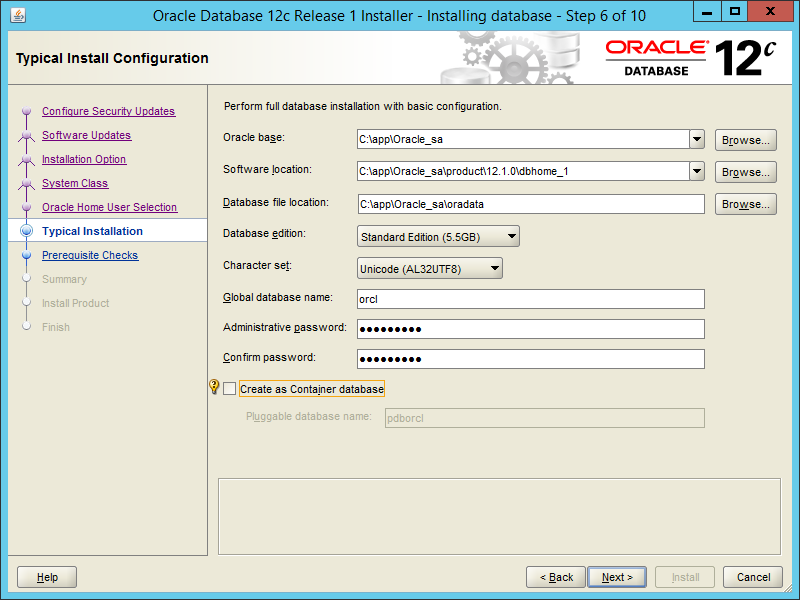
Accept the default file locations.
Select the database edition.
Use the “AL32UTF8” Character set.
Enter an admin password.
DO NOT CREATE AS A CONTAINER DATABASE!!! Please make sure this check box is not selected.
 Select “Next”. Installation will begin.
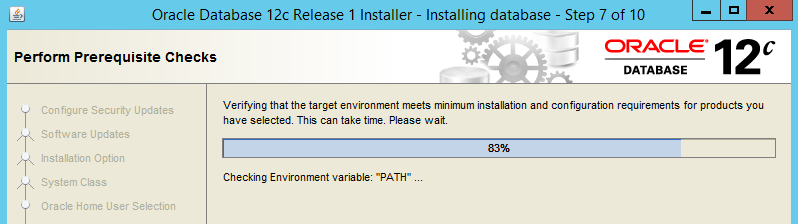
The installer will check prerequisites and then present a summary of selected options.
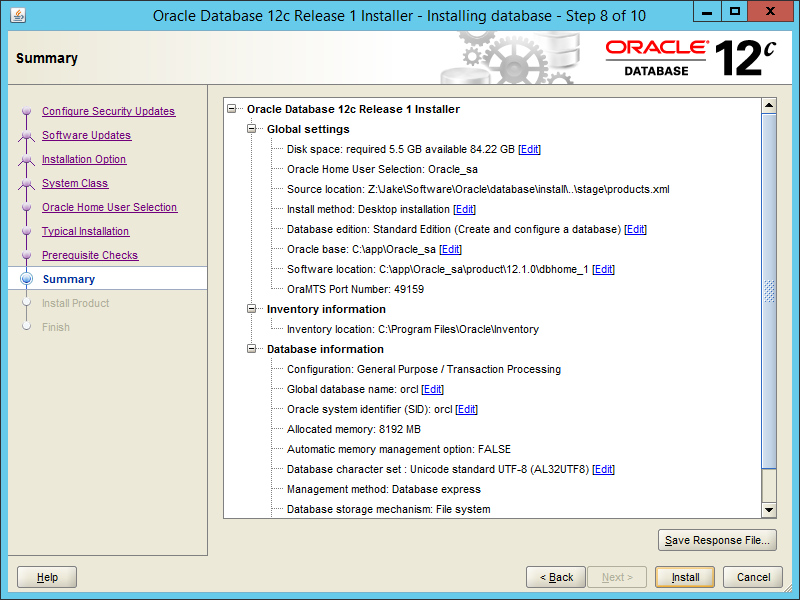
Select “Install”. This part takes a while. Eventually the screen below will be displayed.
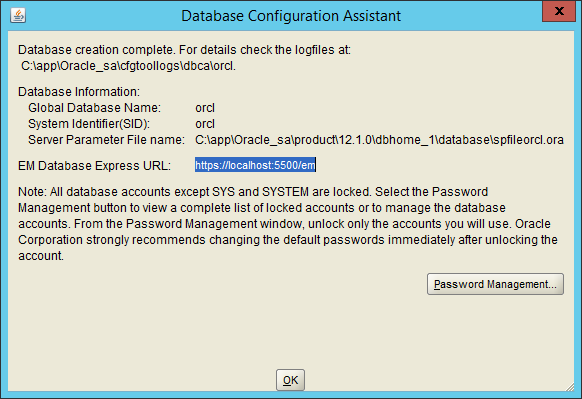
Select “OK”, then “Close”.
Update Oracle Networking Files
There are three key files that must be updated, called “tnsnames.ora”, “listener.ora” and “sqlnet.ora”. These files are located in the following directory:
C:\app\Oracle_sa\product\12.1.0\dbhome_1\NETWORK\ADMIN
Edit the “listener.ora” file. Update the HOST with the static IP address you assigned to the network adapter.
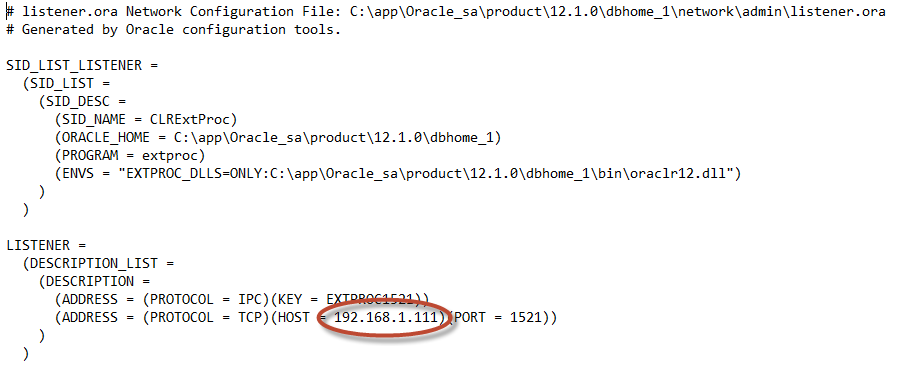
Save the “listener.ora” file.
Edit the “tnsnames.ora” file. Update the HOST with the static IP address you assigned to the network adapter.
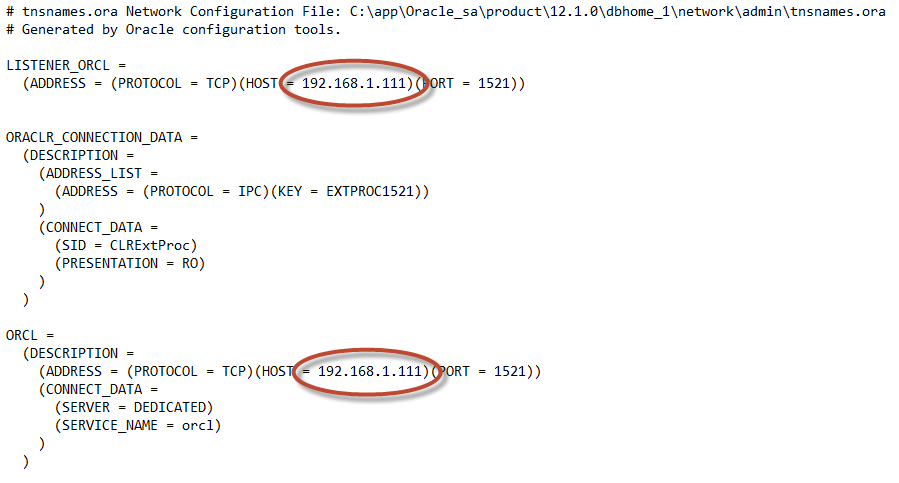
Note that the IP address is updated in two locations above.
Save the “tnsnames.ora” file.
Edit the “sqlnet.ora” file. Add the line circled below.

Save the “sqlnet.ora” file.
Shut down your VM and take a snapshot.
In the Next Post
With the relational database installed, it’s time to create the application repositories. Click here for the next post in the series.