Some Context . . .
This is the fourth post in a multi-part blog educating readers on how to build a personal “sandbox” environment for Hyperion Planning. Click here to see all nine posts in the series.
Creating a Virtual Machine
Now that VMware Workstation has been installed, the fun begins. The following steps will create a virtual server that runs on your host. In my case, the host is my laptop. Make sure you have your server operating system software available, along with any required license key.
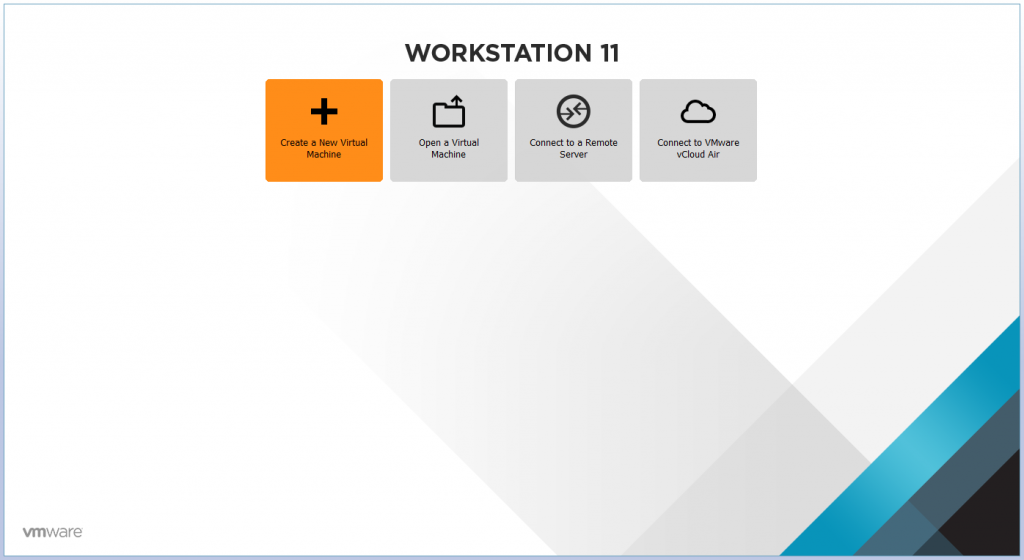
To get started, launch VMware Workstation.
Select “Create a New Virtual Machine”.
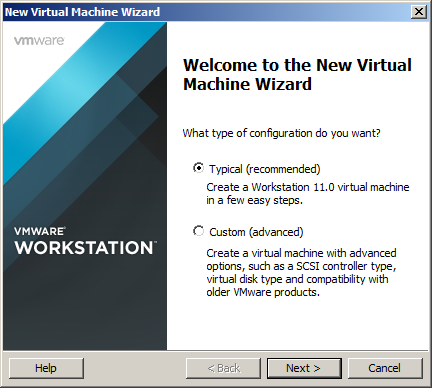
Create a “Typical” VM. Select “Next”.
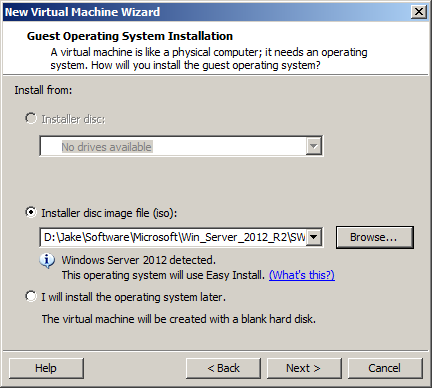
Tell VMware where the Windows Server installation media is located. You can point to either a drive, or an ISO file. I’m using an ISO file above. Select “Next”.
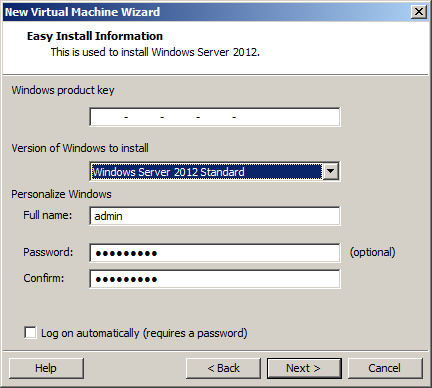
Select the version of Windows you are using. Enter the product key, user ID and password. This is the user ID and password that you will use to log into Windows Server 2012. Select “Next”.
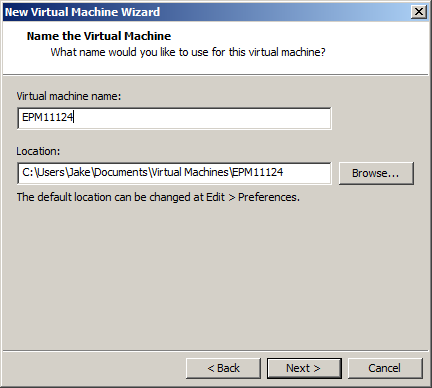
Enter a name for the virtual machine. This is not the actual “computer name” in Windows, but rather the name of the VM within VMware Workstation. I tend to use the same name from my VM and Windows computer name.
Provide a location for the files. I recommend creating a specific directory for each VM as many files are created. Having them all in a single directory makes it easier to move them around. Select “Next”.
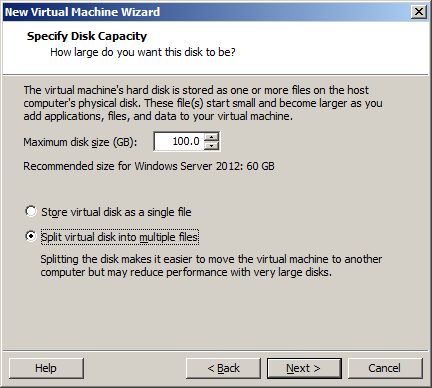
Give your VM somewhere around 70-100GB. You can use less space if you don’t intend on loading a lot of data into Essbase.
Make sure to select the option to split the VM files into multiple files. This will simplify moving these files at a later date. Select “Next”.
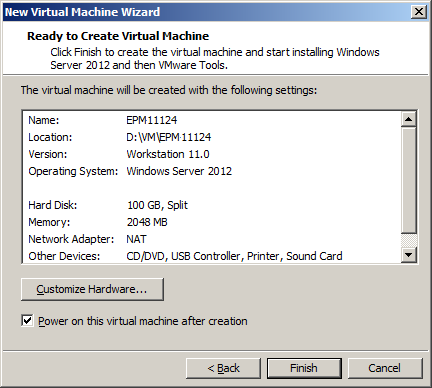
Review your VM settings. Be especially aware of where you are placing the VM files as these can take significant space.
Some of these settings will be updated later. Select “Finish”.
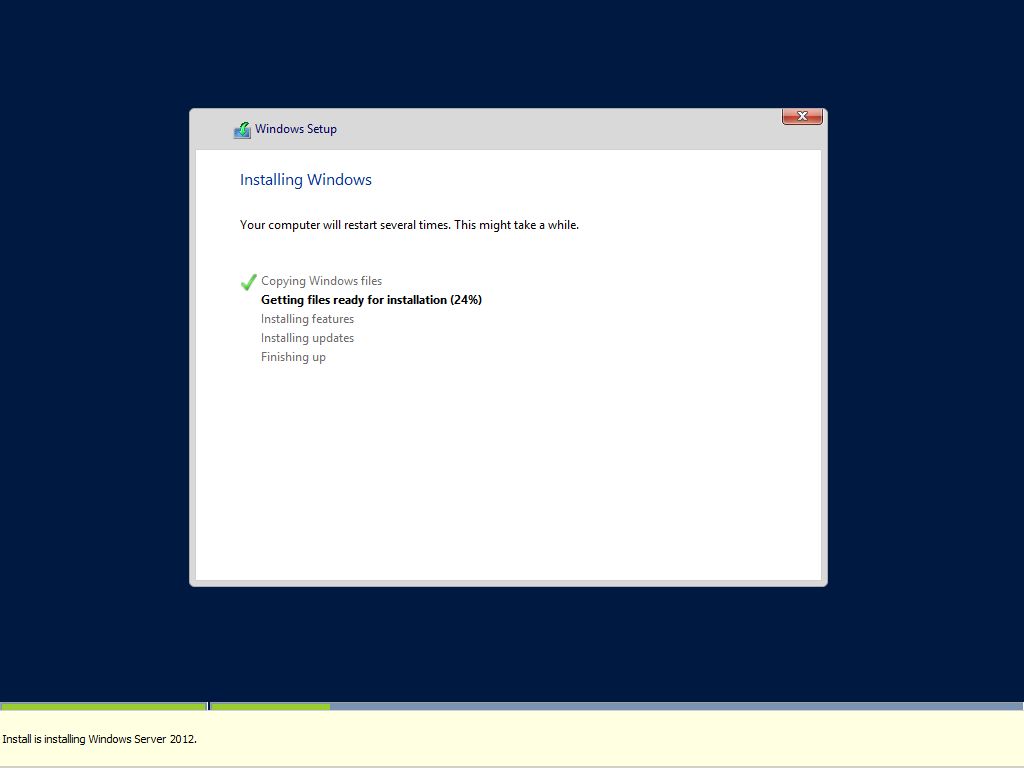
VMware will begin installing Windows Server 2012 R2.
The install takes a bit. Windows Server will eventually restart.
Your server operating system is now installed on your VM, however there are some remaining configuration steps that are still required.
Changing the Server Name
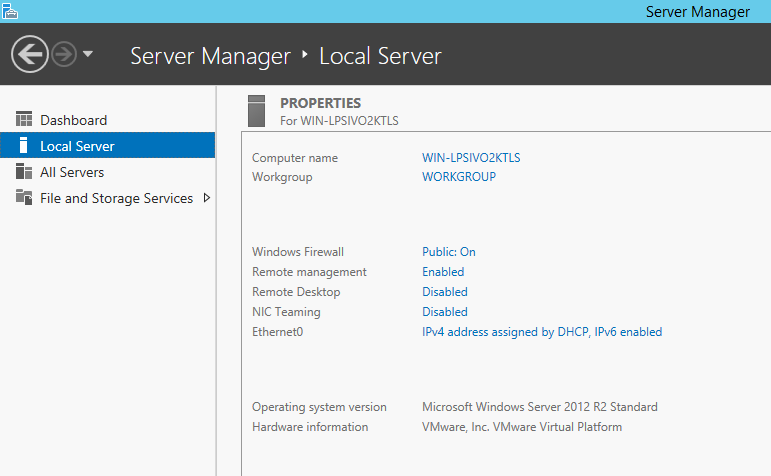
After logging back into your virtual server, Server Manager should be displayed. Select the “Local Server” tab.
Click on the server name (mine is “WIN-LPSIVO2KTLS” above, however yours will be different).
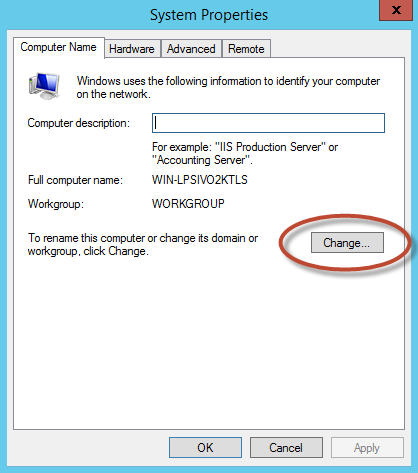
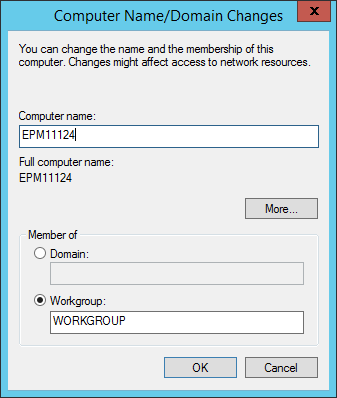
Press the “Change” button, and provide a name for the virtual server.
Select “OK”. After being prompted to restart, select “OK”. Close the System Properties window and select “Restart Now”.
Run Windows Update (Optional)
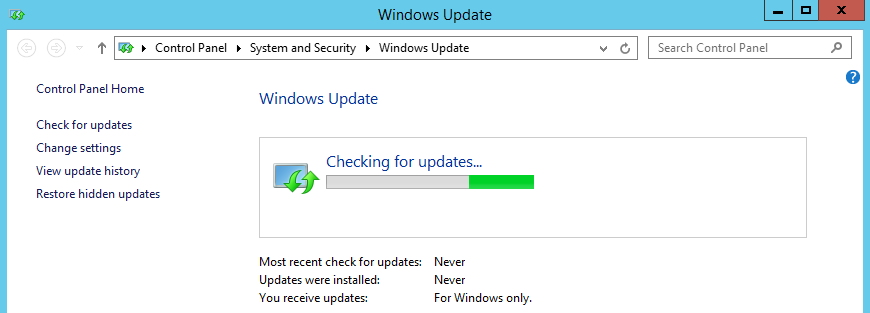
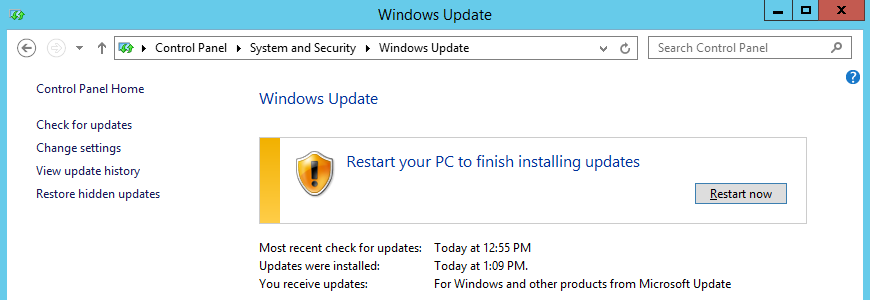
Navigate to Control Panel. Select “System and Security”. Under “Windows Update”, select “Check for Updates”.
Select “Install Updates”. Get some coffee . . . this takes a while.
Select “Restart Now”.
Firewalls
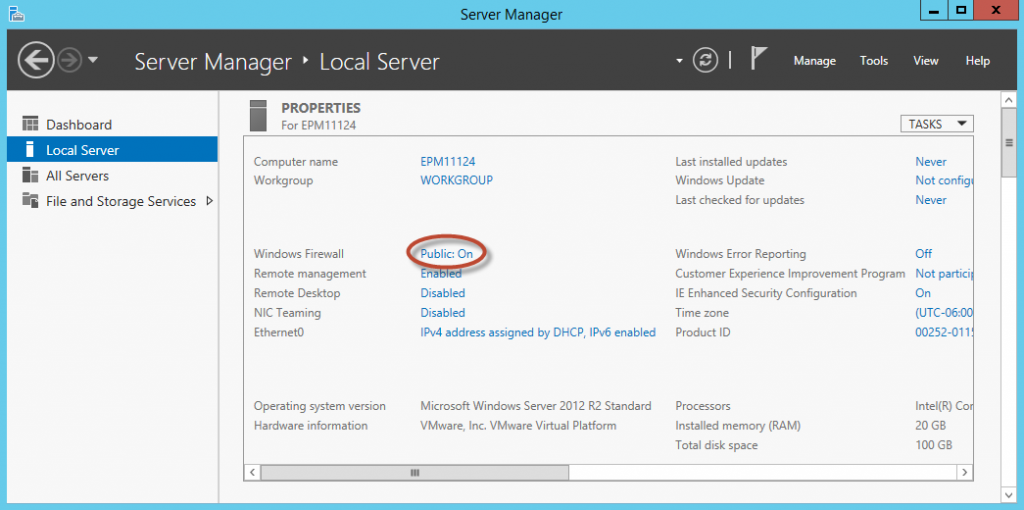
Firewalls can complicate the installation and configuration of certain EPM products. If you use your VM’s intermittently, you may consider turning off the firewall on your VM’s operating system. Please note that this would likely not be appropriate for a “real” environment. To turn off the Windows firewall on your VM, launch the Server Manager dashboard. Select “Local Server”.
Click the “Public: On” link.
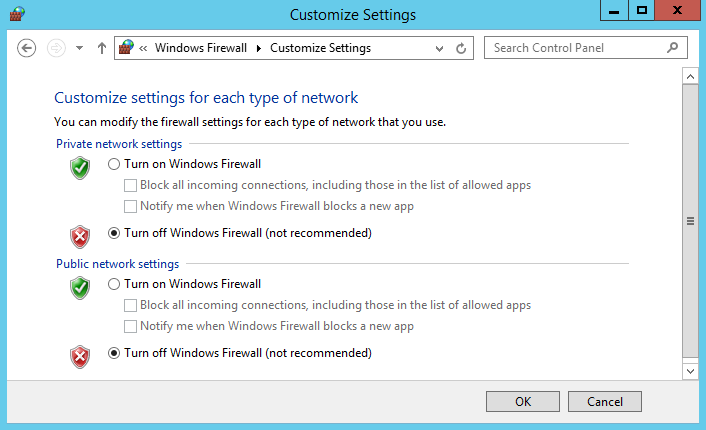
Select “Turn Windows Firewall on or off”. Turn off the firewall.
Select “OK”.
Select “Finish”.
Assign Static IP Addresses
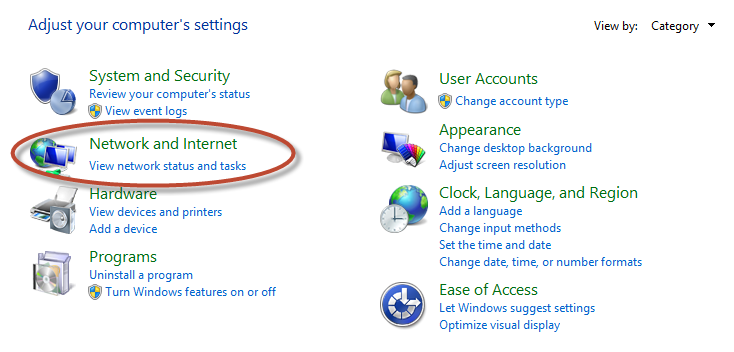
Navigate to Control Panel.
Select “Network and Internet”.
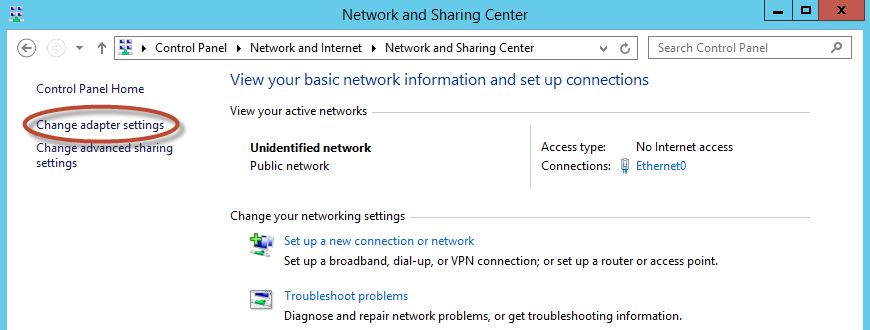
Select “Network and Sharing Center”.
Select “Change Adapter Settings”.
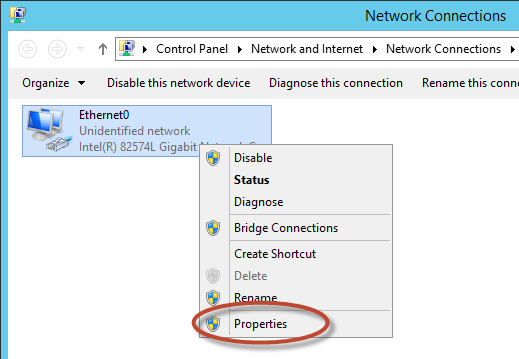
Right-click on the network adapter. Select “Properties”.
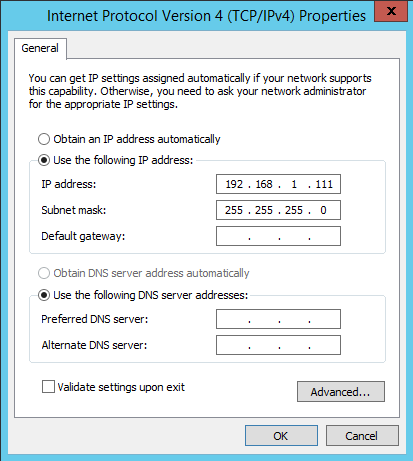
Double-click on “Internet Protocol Version 4 (TCP/IPv4)”.
Assign a “non-routable” IP address (like the one I used above).
Select “OK”, then select “OK” again.
Update the HOSTS File
Edit the hosts file located in:
C:\Windows\System32\drivers\etc
Add the line circled above, using the static IP address you assigned to your network adapter. Make sure to use the name of your server.
Disable UAC
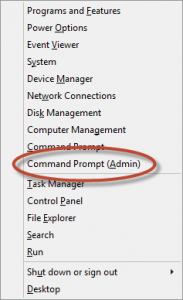
Before installing Hyperion Planning, UAC (User Account Control) must be deactivated. To do this, open a command prompt. Press the Windows Key then “X”.
Select “Command Prompt (Admin)”.
Type “regedit” in the command prompt.
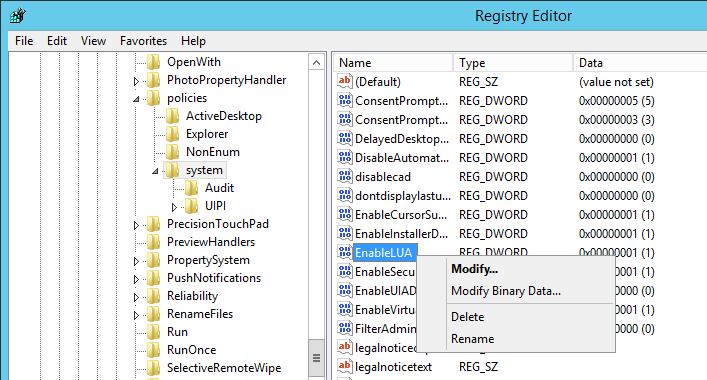
Navigate to “HKEY_LOCAL_MACHINE\SOFTWARE\Microsoft\Windows\CurrentVersion\policies\system”.
Select the “system” member above.
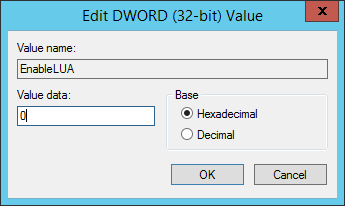
Right-click the DWORD “EnableLUA”. Select “Modify”.
Change the data value from 1 to 0. Select “OK”.
Restart the virtual server.
Miscellaneous VM Settings
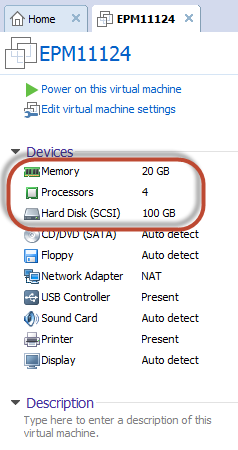
Before going too far, now may be a good time to increase the memory and processors dedicated to the VM. I recommend 12GB of RAM for a “compact deployment” and 20GB for a regular deployment. I also start with 4 processors. These settings can be changed later on, so don’t worry too much about getting them exactly “right”.
Click on your VM’s memory under “Devices”.
Increase memory and CPU count as required.
Select “OK”.
Photo Finish
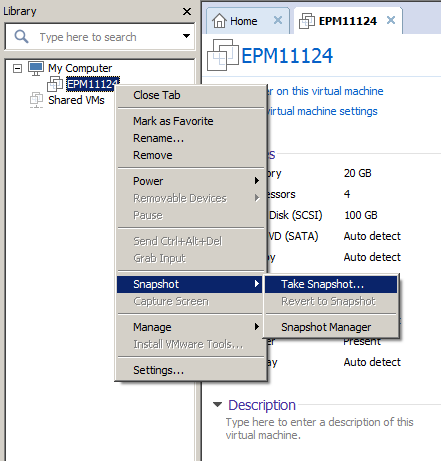
At this point, your operating system is configured! After all of this work, it’s a good idea to take a snapshot in VMware Workstation. In the event that something goes wrong later in the installation, developers can revert to a snapshot so they aren’t starting over from scratch.
The ability to revert to a snapshot is the most incredibly awesome feature of any virtualization software. It allows developers to try things, make mistakes, and then revert to an old snapshot. It’s like a free “do-over”. But it only works if you actually take the snapshot, so take snapshots often. And be aware that they do take disk space.
Right-click on the server name in VMware Workstation and select “Snapshot”, then “Take Snapshot”.
Take notes regarding the work done to date.
Select “Take Snapshot”.
Restart the VM.
In the Next Post
With the operating system installed, it’s time to install and configure the relational database. Click here for the next post in the series.

