Some Context . . .
This is the eighth post in a multi-part blog educating readers on how to build a personal “sandbox” environment for Hyperion Planning. Click here to see all nine posts in the series.
Installation vs Configuration
When we installed Hyperion Planning and the related EPM applications in the previous post, we installed all products at once. As we move on to configuration, we will configure the products one at a time. Could we attempt to configure everything at once? Yes, however in previous versions, this caused problems, so we will take a more conservative approach.
Configure Shared Services
To launch the configuration utility, navigate to the Apps window in Server 2012 (from the Start Menu).
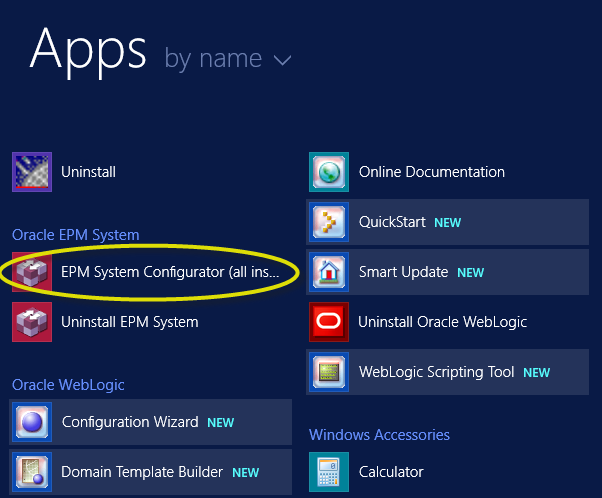
Right-click on the “EPM System Configurator” and select “Run as Administrator”. The EPM System Configurator will be displayed.

Select the Home Directory and Instance Name. Select “Next”.
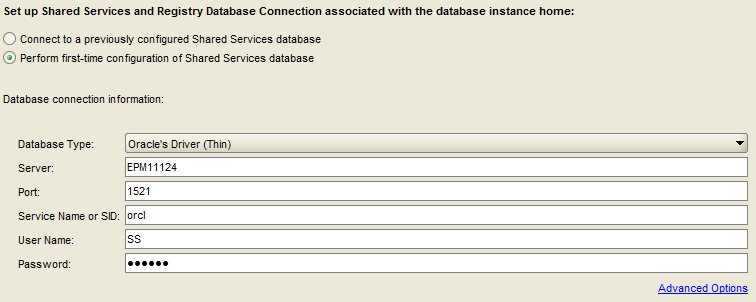
Select “Perform first time configuration of Shared Services database”.
Confirm the database driver, server and port.
Enter the Oracle SID, user name and password for the Shared Services repository.
ENSURE THAT THE USER ID AND PASSWORD ARE CORRECT!!! If the wrong user ID and password are used, Shared Services tables and other objects will be created in the wrong schema, making a mess.
Select “Next”.
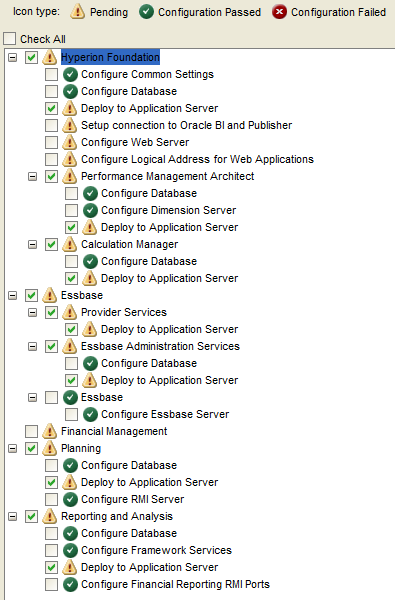
The screen below should be displayed. If a network IO error is displayed instead, please see the point in the previous post about updating the server name in the “listener.ora” file. Ensure that the server was rebooted (or the Oracle RDBMS service restarted) after that change.

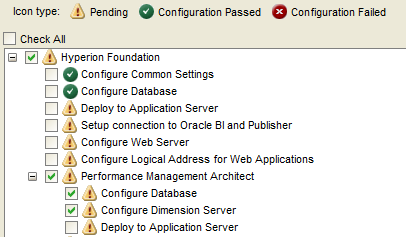
Select “Uncheck All” and expand “Hyperion Foundation”.
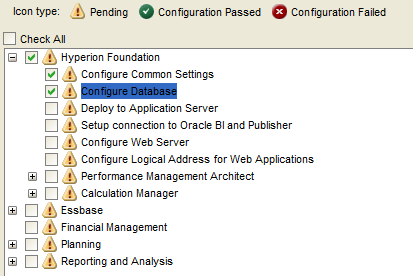
Select “Configure Common Settings” and “Configure Database”.
Select “Next”.
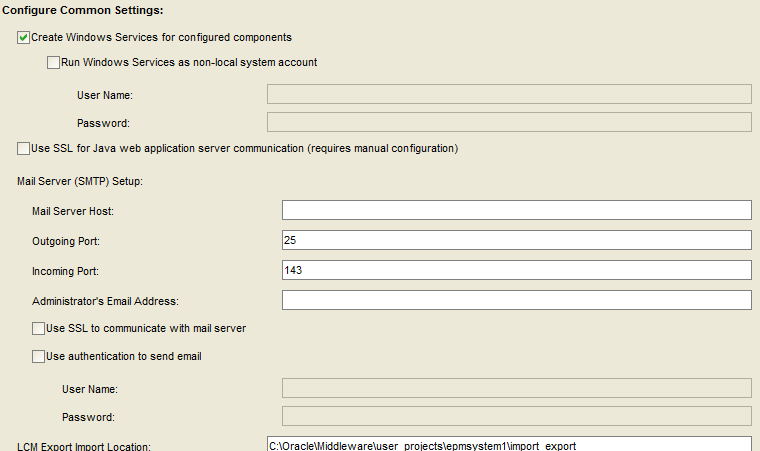
Accept the defaults and select “Next”.

Enter a user ID and password for the Shared Services admin user.
Make a note of this very important user ID and password.
Select “Next”.

Confirm the configuration tasks.
Select “Next”.

Ensure that all configuration steps are successful.
Select “Task Panel” to continue the configuration process, or “Finish”. If “Finish” is selected, simply restart the Config Tool to continue the configuration process.
Configure Essbase and EAS
Select the options below in the Config Tool to configure Essbase and EAS.
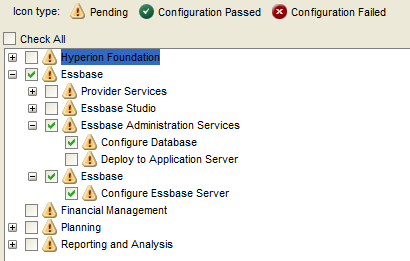
Select “Next”.

Update the Username and Password for the correct EAS schema.
ENSURE THAT THE USER ID AND PASSWORD ARE CORRECT!!! If the wrong user ID and password are used, EAS tables and other objects will be created in the wrong schema, making a mess.
Select “Next”.
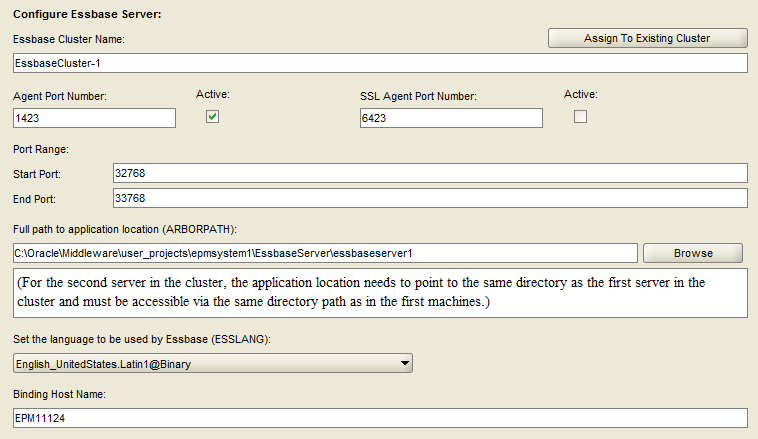
Accept the default Essbase server information. Select “Next”.
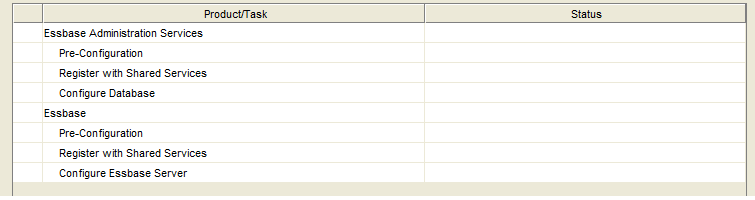
Confirm the configuration tasks.
Select “Next”.
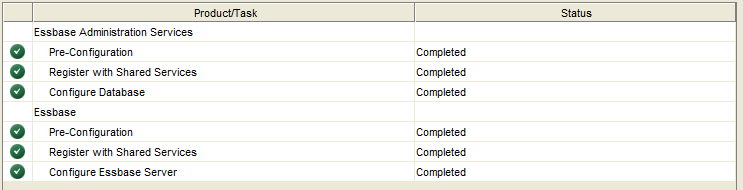
Ensure that all tasks complete successfully.
Select “Task Panel” to continue the configuration process, or “Finish”. If “Finish” is selected, simply restart the Config Tool to continue the configuration process.
Configure EPMA
Select the options below in the Config Tool to configure EPMA.
Select “Next”.

Update the Username and Password for the correct EPMA schema.
ENSURE THAT THE USER ID AND PASSWORD ARE CORRECT!!! If the wrong user ID and password are used, EPMA tables and other objects will be created in the wrong schema, making a mess.
Select “Next”.

Accept the default dimension server ports.
Select “Next”.

Confirm the configuration tasks.
Select “Next”.

Confirm that all configuration steps completed successfully.
Select “Task Panel” to continue the configuration process, or “Finish”. If “Finish” is selected, simply restart the Config Tool to continue the configuration process.
Configure Planning
Select the options below in the Config Tool to configure Planning.
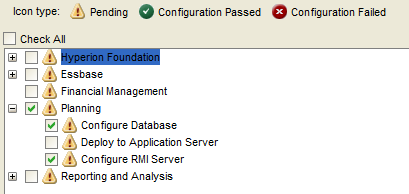
Select “Next”.

Update the Username and Password for the correct Planning schema.
ENSURE THAT THE USER ID AND PASSWORD ARE CORRECT!!! If the wrong user ID and password are used, Planning tables and other objects will be created in the wrong schema, making a mess.
Select “Next”.

Accept the default RMI port.
Select “Next”.

Confirm the configuration tasks.
Select “Next”.

Confirm that all configuration steps completed successfully.
Select “Task Panel” to continue the configuration process, or “Finish”. If “Finish” is selected, simply restart the Config Tool to continue the configuration process.
Configure Calc Manager
Select the options below in the Config Tool to configure Calc Manager.

Select “Next”.

Update the Username and Password for the correct Calc Manager schema.
ENSURE THAT THE USER ID AND PASSWORD ARE CORRECT!!! If the wrong user ID and password are used, Calc Manager tables and other objects will be created in the wrong schema, making a mess.
Select “Next”.

Confirm the configuration tasks.
Select “Next”.
Confirm that all configuration steps completed successfully.

Select “Task Panel” to continue the configuration process, or “Finish”. If “Finish” is selected, simply restart the Config Tool to continue the configuration process.
Configure Financial Reports
Select the options below in the Config Tool to configure Financial Reports.
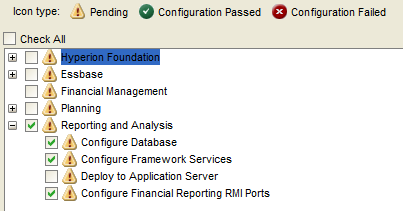
Select “Next”.

Update the Username and Password for the correct Reporting and Analysis schema.
ENSURE THAT THE USER ID AND PASSWORD ARE CORRECT!!! If the wrong user ID and password are used, Reporting and Analysis tables and other objects will be created in the wrong schema, making a mess.
Select “Next”.
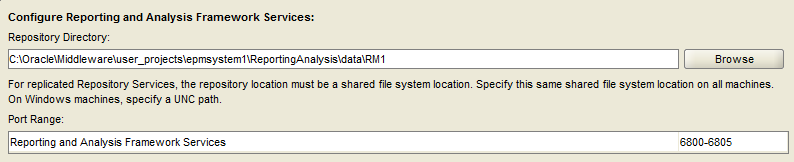
Select the default location and port range.
Select “Next”.

Accept the default ports.
Select “Next”.

Select the default RMI ports.
Select “Next”.

Confirm the configuration tasks.
Select “Next”.

Confirm that all configuration steps completed successfully.
Select “Task Panel” to continue the configuration process, or “Finish”. If “Finish” is selected, simply restart the Config Tool to continue the configuration process.
Deploy the App Server
The previous steps configured the repositories of each individual product. The next step is to deploy to the application server. We will do this for all products at once.
Select the options below in the Config Tool to deploy to the application server.
Select “Next”.
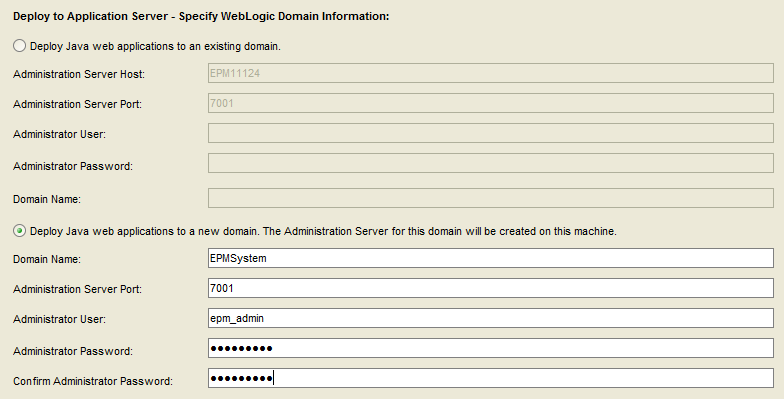
Enter a password for the domain admin.
Select “Next”.
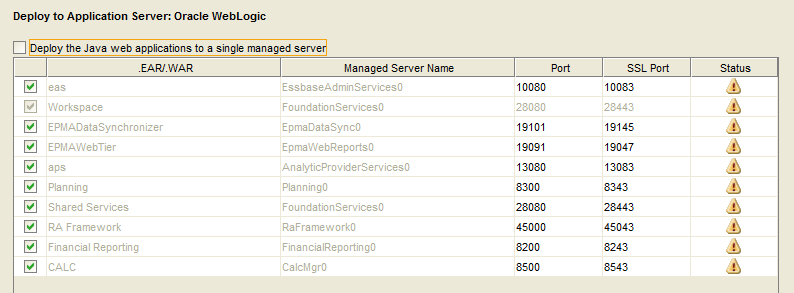
Pay special attention to the check box at the top of this screen. The option to deploy the Java web applications to a single managed server is referred to as a “Compact Deployment”. Compact Deployment is often useful when limited server memory is available. (E.g., less than 16GB) Unfortunately, compact deployment can make it difficult to debug problems with individual products. I prefer to not use Compact Deployment; however there are situations where it is appropriate.
Select “Next”.
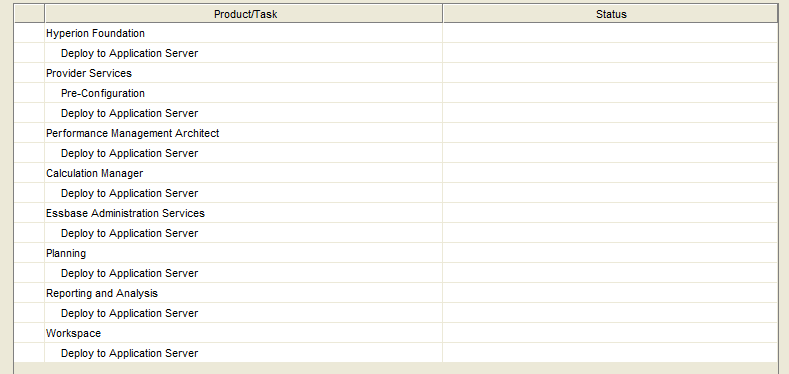
Confirm the configuration tasks.
Select “Next”.
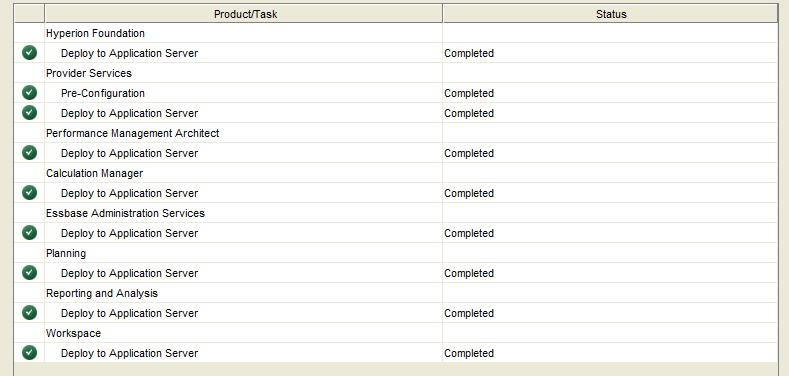
Confirm that all configuration steps completed successfully.
Select “Task Panel” to continue the configuration process, or “Finish”. If “Finish” is selected, simply restart the Config Tool to continue the configuration process.
Configure Web Server
Select the options below in the Config Tool to configure the web server.
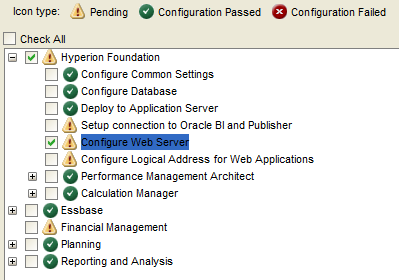
Select “Next”.
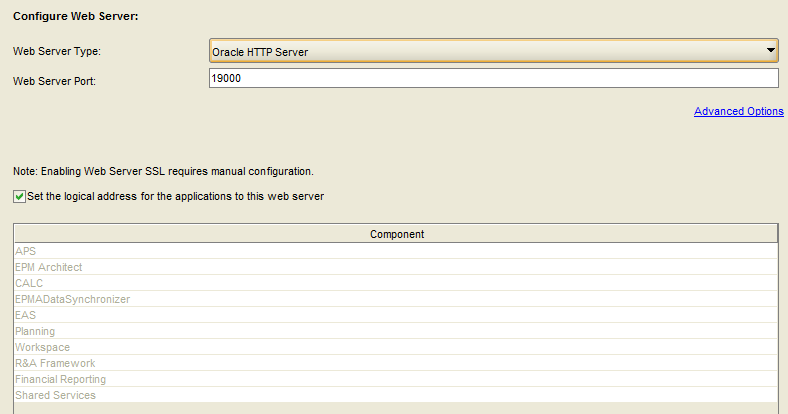
Use the Oracle HTTP Server.
Select “Next”.

Confirm the configuration tasks.
Select “Next”.
A command prompt will open. A script will launch and eventually close.

Confirm that the configuration was a success.
Select “Finish”.
Configure the Services
The services created by the Config Tool in the previous steps will be set to start automatically. I prefer setting these to start manually. They can then be started by running the pre-built startup and shutdown scripts.
** NOTE – Most infrastructure consultants create custom start/stop scripts.
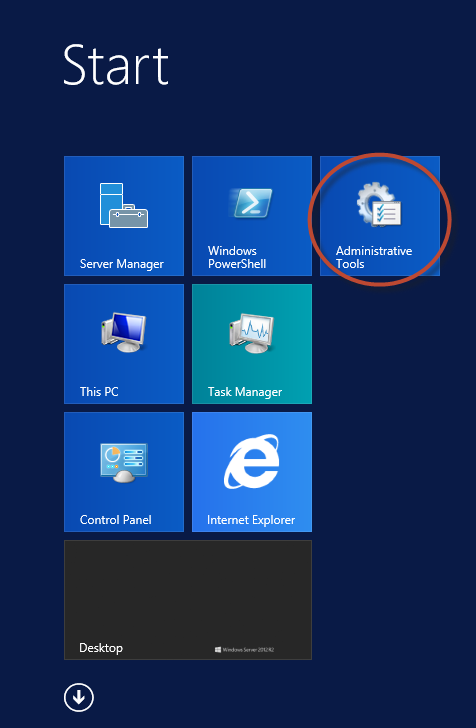
To change the services to manual startup, navigate to Control Panel by selecting the “Start” button.
Select “Administration Tools”.
Double-click “Services”. Scroll down to the Oracle services.
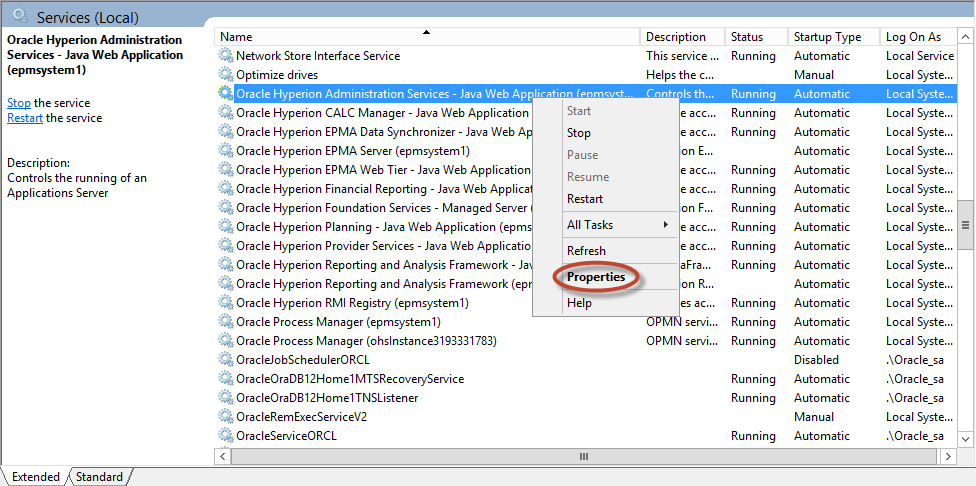
Right-click on each Oracle service (except RDBMS services) and select “Properties”.
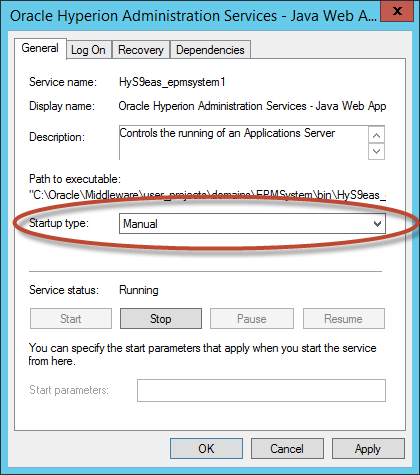
Change the startup type to “Manual”.
Select “OK”.
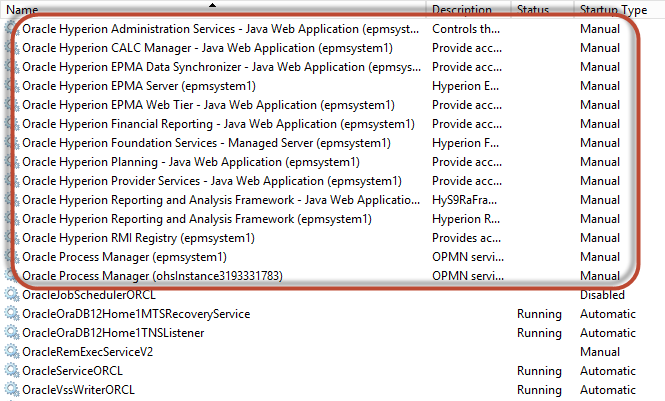
Perform this step for each service in the red square above. The remaining Oracle services are RDBMS-related, and can be left as-is.
Starting the EPM System
Restart your VM.
Navigate to the applications in Windows Server 2012.

Take note of the two scripts above used to Start and Stop EPM services (circled in green).
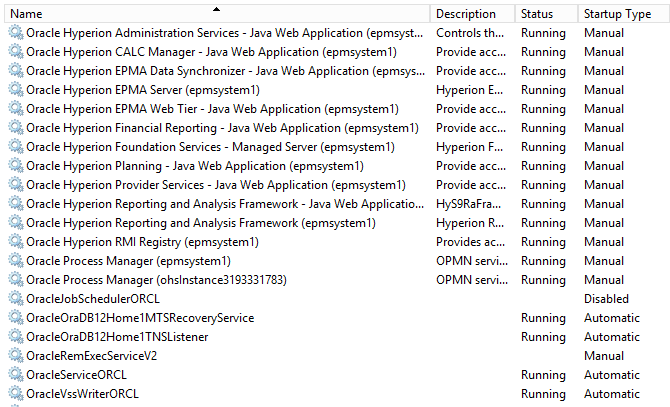
Select the “Start EPM System” icon. A script will run to start the EPM services (this may take a bit). Once the script completes, confirm that all Oracle EPM services are running by navigating to Services.
Alternatively, you may also review the startup logs in:
C:\Oracle\Middleware\user_projects\epmsystem1\diagnostics\logs\starter
The Moment of Truth . . .
Open a browser on your host.
Navigate to the following URL to access Workspace:
http://<INSERT SERVER NAME HERE>:19000/workspace/index.jsp
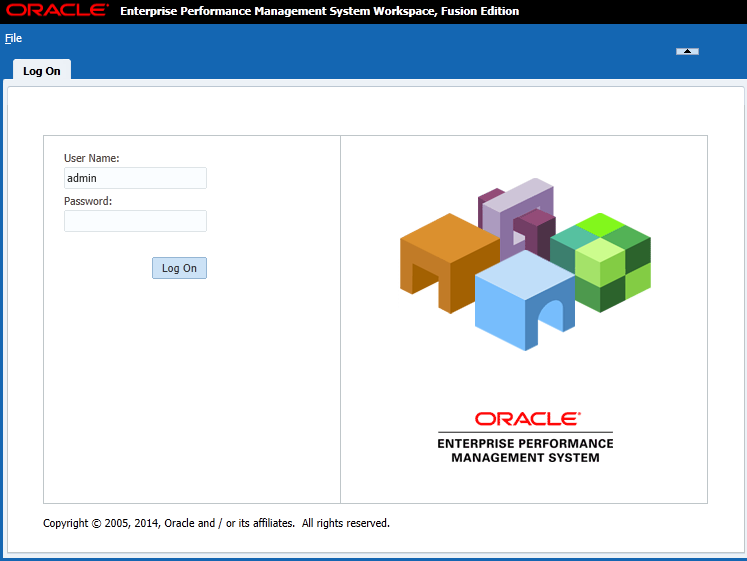
Login with the Shared Services “admin” user ID and password.
Logout.
Navigate to the following URL to access the new simplified Hyperion Planning interface:
http://<INSERT SERVER NAME HERE>:8300/HyperionPlanning
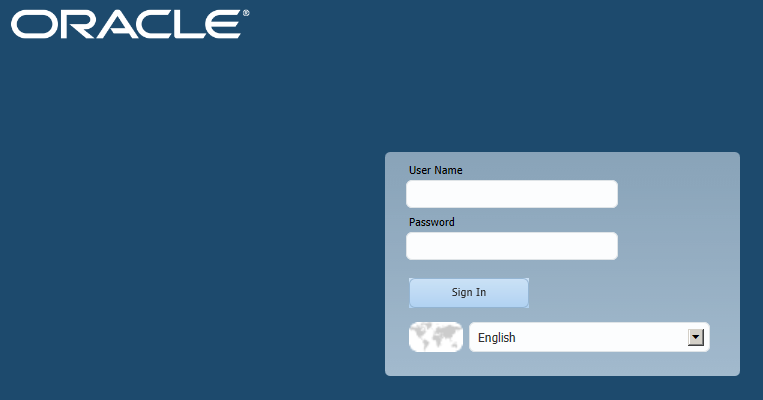
Login with the “admin” user ID and password.
A screen will be displayed stating that there are no applications (we will create an app in the next post).
Logout.
Run the script to shut down the EPM Services. Always try to gracefully shut down the services prior to shutting down your VM.
Take a snapshot.
Congratulations!!! You now have your very own Hyperion Planning sandbox environment.
In the Next Post
Things should be looking very good at this point. The next step is to build an actual Hyperion Planning application! Click here for the last post in the series.